
If you’ve spent any time at all with Sage Intacct, you’ll know that it can do plenty out of the box.
But as many can vouch for, sometimes to get the most out of a software, it needs to be customised to meet your needs first.
Luckily, this is something you can do easily in Sage Intacct. In this article, we’ll take you through some ways you can customise your Sage Intacct experience. And if that’s piqued your interest, read to the end for access to a free webinar recording!
Prerequisites
Before we start, there are some key things you need to know about who can make certain customisations.
Access to this is based on your admin privileges. To be able to set up the following customisations, you must:
- Be subscribed to Platform Services (should have already been done during your configuration)
- Have admin rights.
Creating List Views
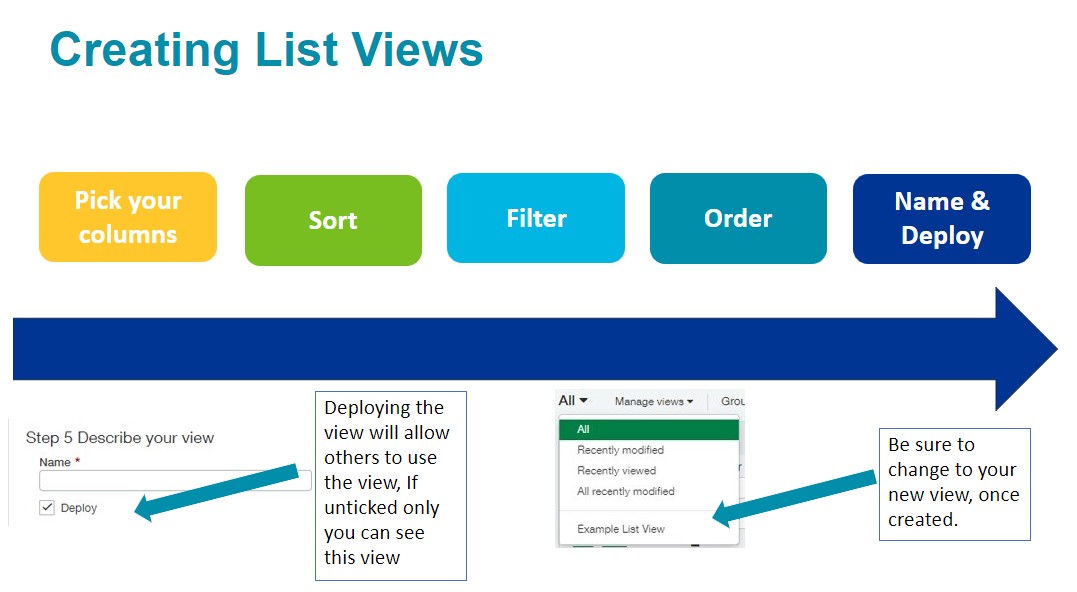
Many of the customisations in Sage Intacct have a built-in software wizard to help you through the process.
You’ll be able to choose what columns to include in your specific list view – from email addresses to VAT registration numbers. Pressing Ctrl + F lets you find specifics easily.
If you want to, you can also filter lists based on specific criteria – e.g. filtering out direct debit customers.
Editing the Entries Layout
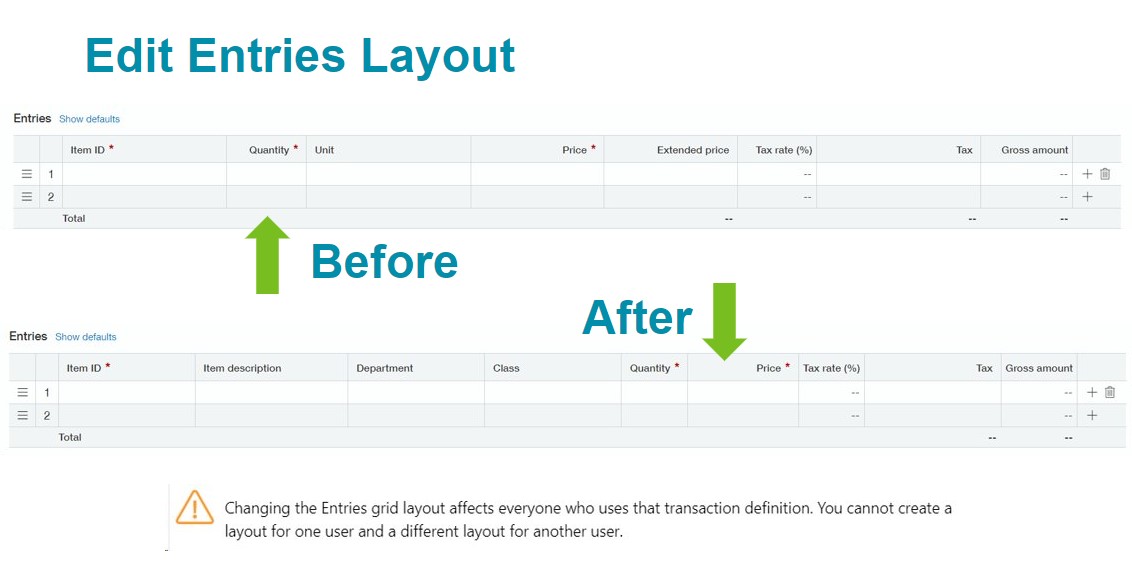
Editing the entries layout is one easy way to avoid data entry errors when multiple people are working on Sage Intacct at the same time, and find fields you need much quicker.
With this function, you’re able to drag and drop fields to the positions that you want.
If someone with admin rights makes changes to the entries layout, that will copy over for all users.
Adding Custom Fields
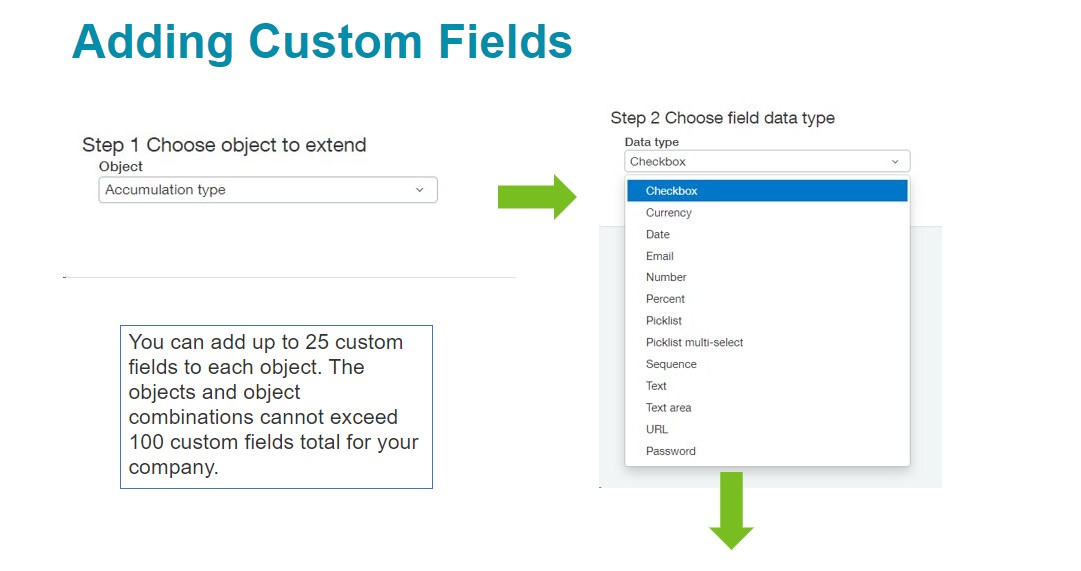
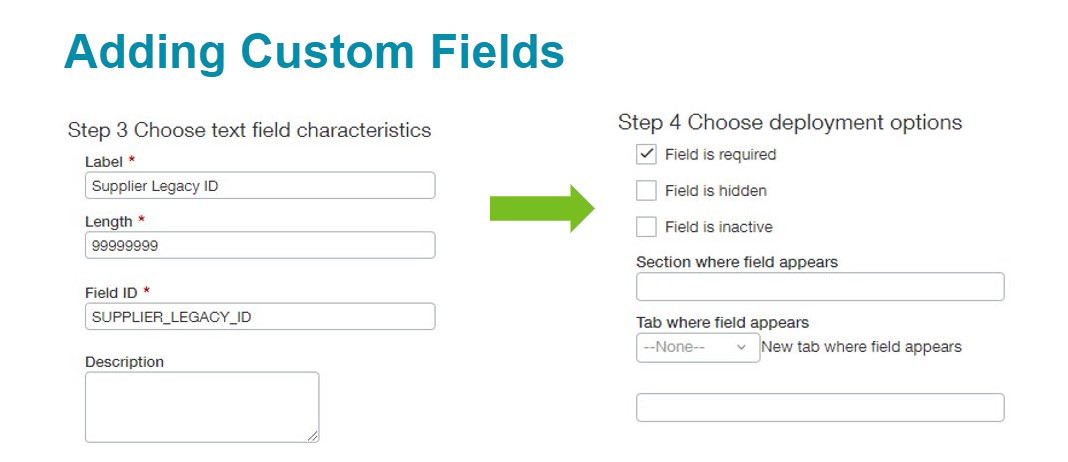
Guided by another wizard tool, you’ll choose the type of object you want to add a custom field to, alongside its characteristics and how the field will show to other users (if at all).
Please note that ID can’t be changed after it’s added to a custom field.
Smart Rules
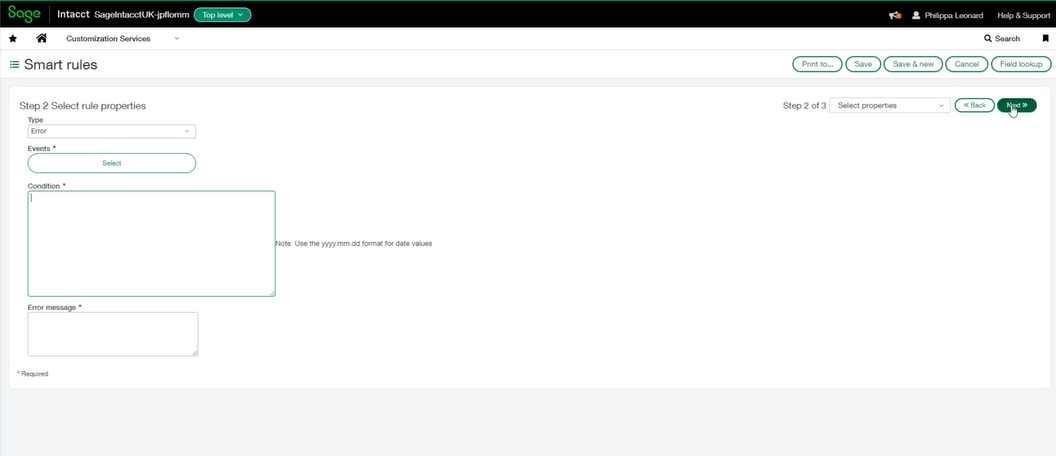
Smart rules are conditions that generate warning messages to users under certain conditions.
There are three types of user input they respond to: Add, Set or Delete.
One of its main uses is enforcing the filling in of required fields – preventing data errors as a result.
Smart Events
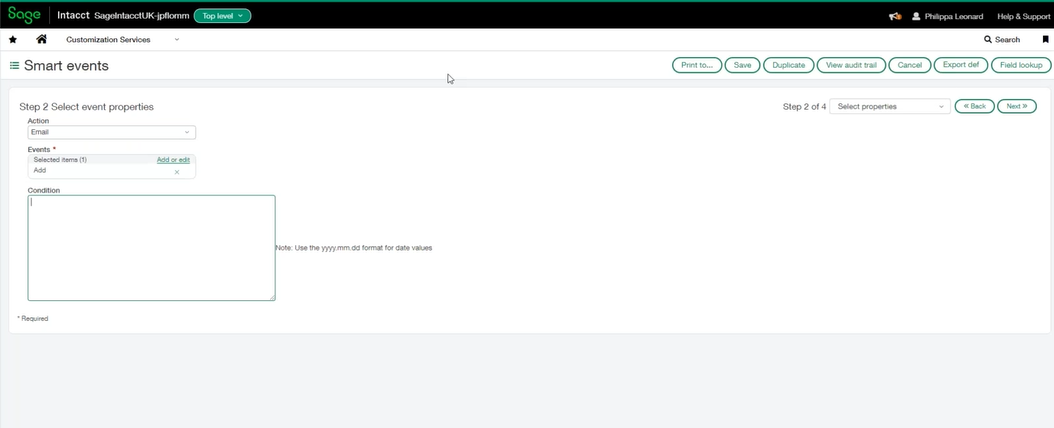
Smart events are triggered when an event occurs and conditions are met. These can be anything – for example, sending an email when a sales quote over a certain value is created. They automate communications based on specific events within your financial management cycle.
Want to go into more detail? You can – with our 30 minute coffee break webinar!
Click below to access it for free:
NB: Be advised that the information/accuracy in this article may differ depending on which version of Sage Intacct you use; as a result, some options and processes might look different. For all support queries please email [email protected].
If you would like more support concerning your Sage system, take a look at our Sage support service. Contact us via the enquiry forms or call 01332 959 008 if you would like more information.
Interested to know more about our Sage solutions?
Call 01332 959008 or enquire online today
"*" indicates required fields